Panasonic GH5 & G9 6K Photo Test

One of my favourite features on the latest flagship Panasonic G range is the 6K photo mode. The GH5 and G9 are both capable of 6K photo at 30fps and 4K at 60fps with the ability to scroll through and extract a still image at the recorded resolution. The recording also gives you a 6K/4K 30fps/60fps, 10 bit, mp4 video file. I like the ability to be able shoot photos and videos simultaneously within the same file. It’s not practical to use this function all the time but it is useful for some situations. There is also the option to record in either 4:3, 3:2, 16:9 and 1:1 aspect ratios.
Learn more about Lumix Lenses Here
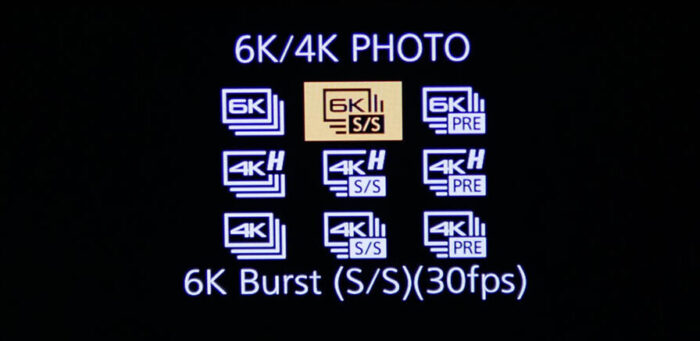
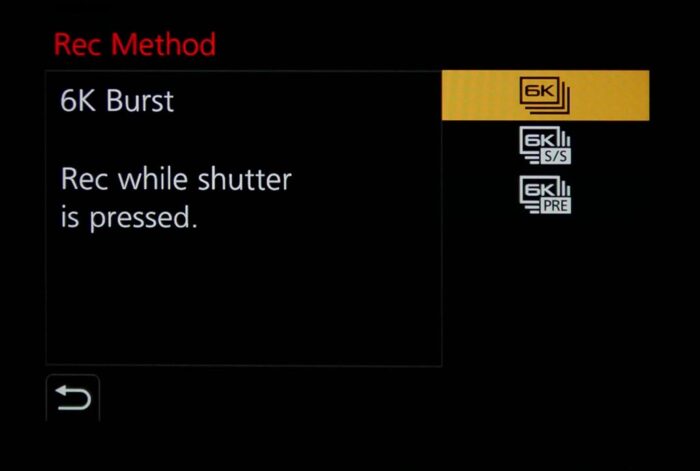
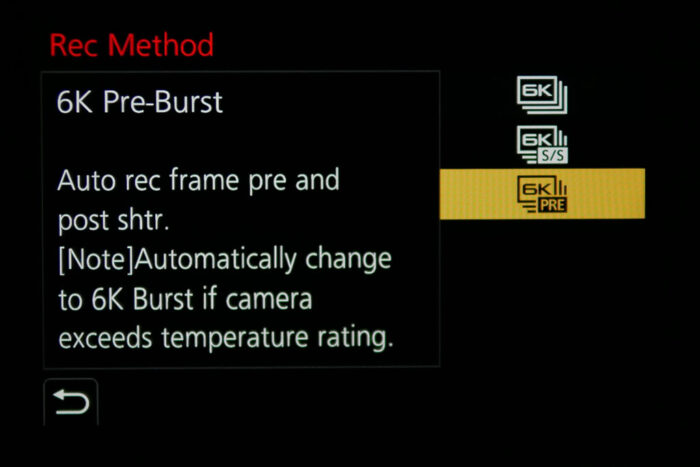
The GH5 and G9 cameras are set up with three different recording methods. 6K/4K burst mode that records while the shutter is pressed. 6K/4K burst (S/S), press shutter to record and again to stop. Personally this is my preferred setting as the video file includes the recorded audio. Then there is the 6K/4K pre burst mode which records an extra second at the beginning and the end of a two second clip.
Another available setting is to activate the pre-burst recording to add an extra second at the start and end regardless of the record method. Loop recording records within a fixed interval of time. At the interval end the recording automatically repeats, replacing previous content from oldest to newest.
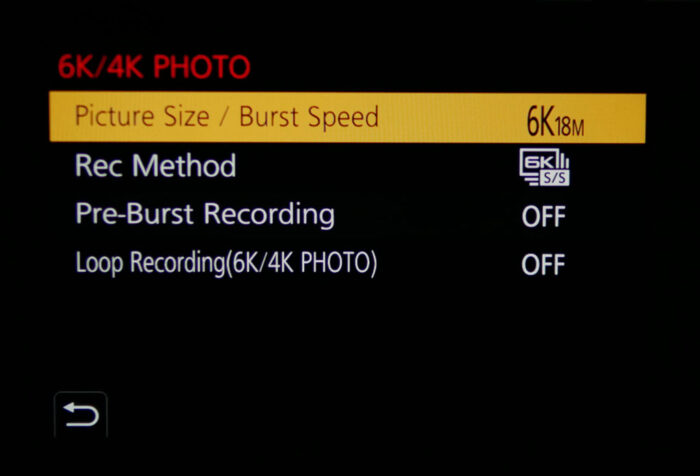
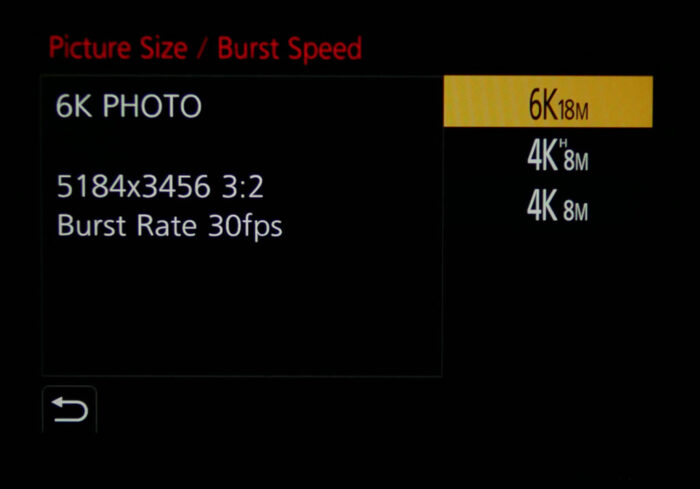
The 6K option allows for 4:3 and 3:2 aspect ratios. 4K recording allows for 4:3, 3:2, 16:9 and 1:1 aspect ratios. At 3:2 6K will record at a maximum of 5184x3456px at a burst rate of 30fps. At 4:3 ratio the pixel dimensions will be 4992×3744 at 30fps.
In 4K mode 4:3 will record at 3328×2496 at either 30fps or 60fps. The 3:2 ratio will produce 3504×2336 dimensions, 16:9 creates standard UHD 4K dimensions at 3840×2160 while 1:1 records at 2880×2880 pixels.
If the 6K photo mode is intended to be used for video to get the extra benefits of 6K resolution video (6K is limited to 30fps 4K can shoot 60fps), make sure your shutter speed is set to twice that of the frame rate. Therefore, aim to have the shutter at around 1/60-1/120s in order to create film like video with natural movement and motion blur.
When the shutter speed is set too high there will be less natural motion blur Your video will simply look like a bunch of hi-res still images stuck together.
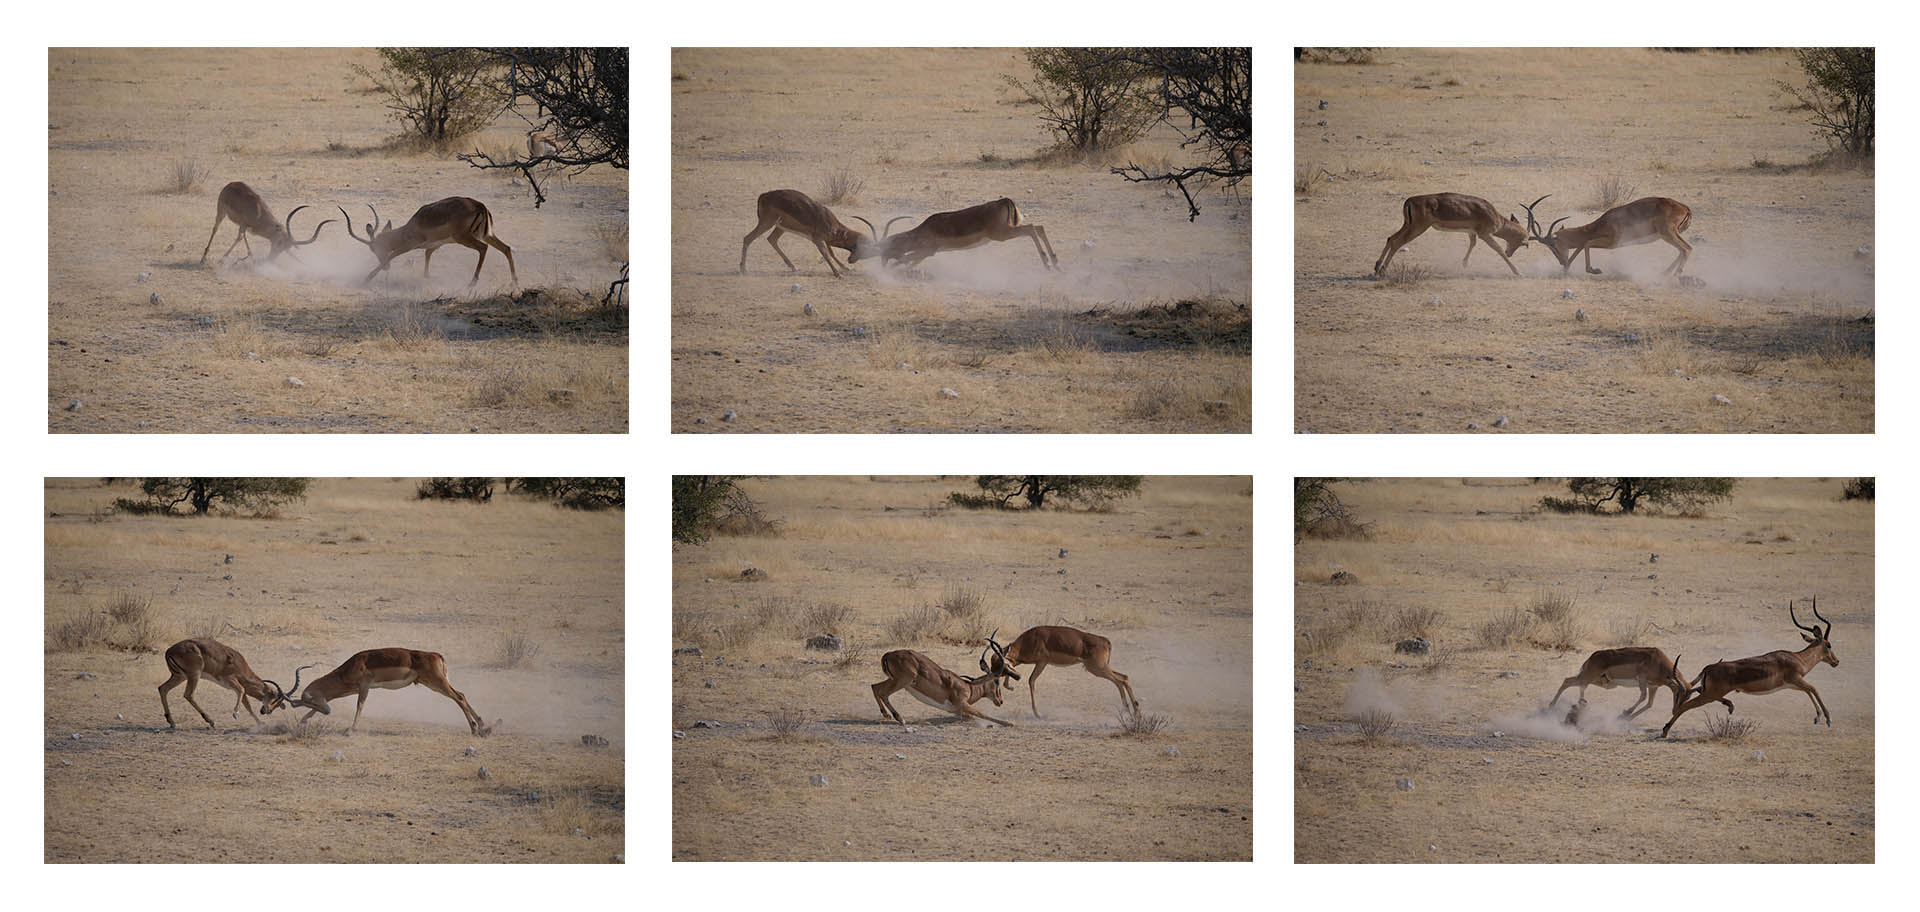
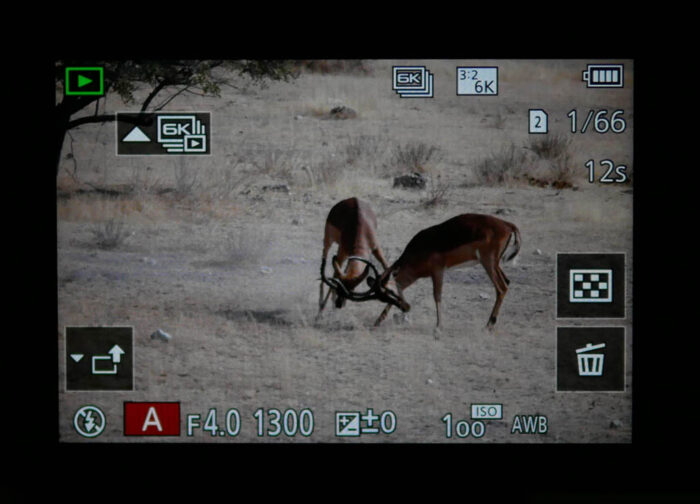
If you can’t get the shutter down low enough just try and avoid extremely fast shutter speeds above 1/200s. Some motion blur can be added in post such as frame blending and optical flow in Adobe Premiere. If your shutter is something like 1/5000s your video will be a disaster. If you’re using it for stills photography then the faster the shutter speed the better, especially for fast moving subjects. The below shows a set of still images saved out of a 12 second clip at 3:2 aspect ratio and 5184x3456px dimensions. Aperture F/4, 1/1300s, ISO100.
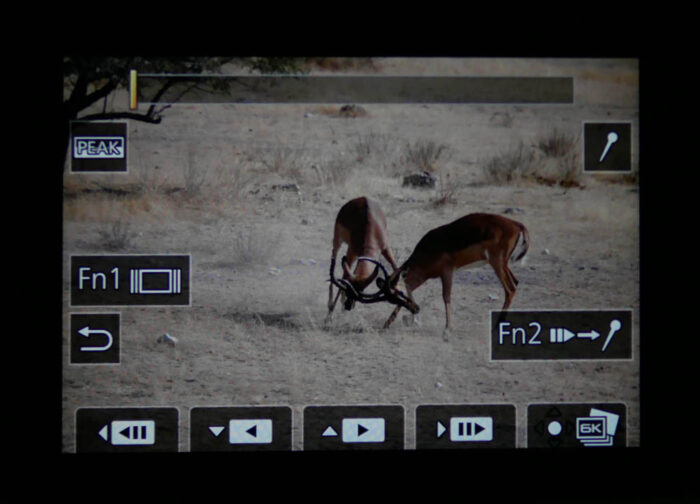
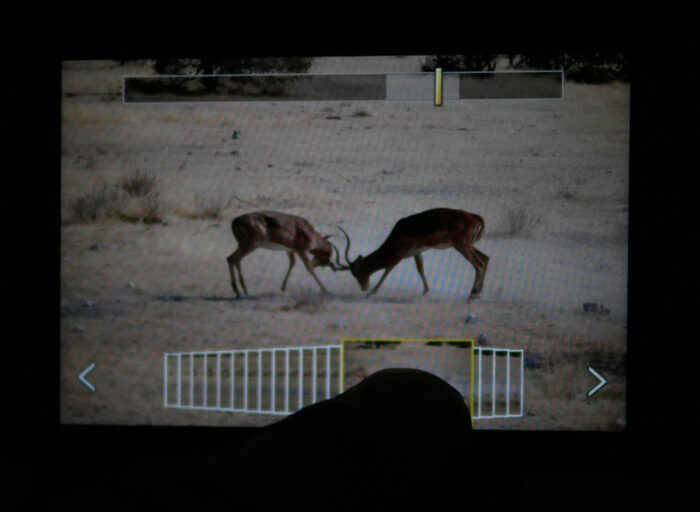
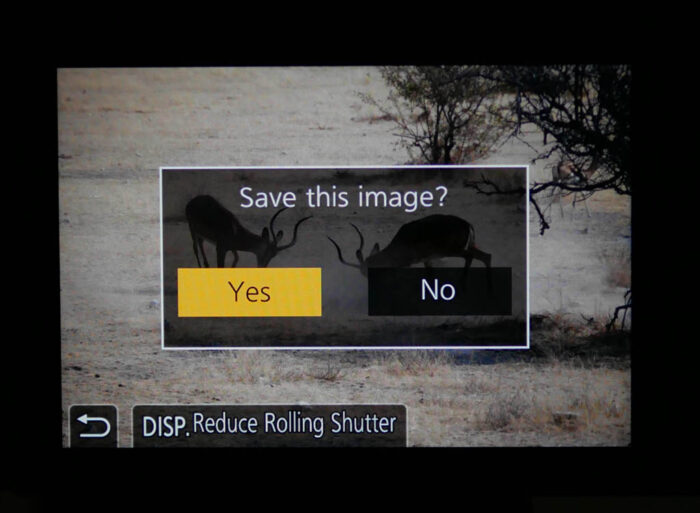
Extracting an image from your 6K/4K footage is very simple. Just pres the play button, scroll through your media and select the a file with the 6K/4K icon in the top left area. Then press the up direction on the menu wheel. Now you’ll have the ability to scroll through each individual frame of the captured footage. To save a frame as a jpeg press the Menu/Set button and select Yes. When scrolling through there is also the option to use playback controls to view the entire video or to scroll with the directional buttons on the scroll menu wheel. When pressing the Fn1 button the interface changes to allow interactive scrolling on the LCD display.
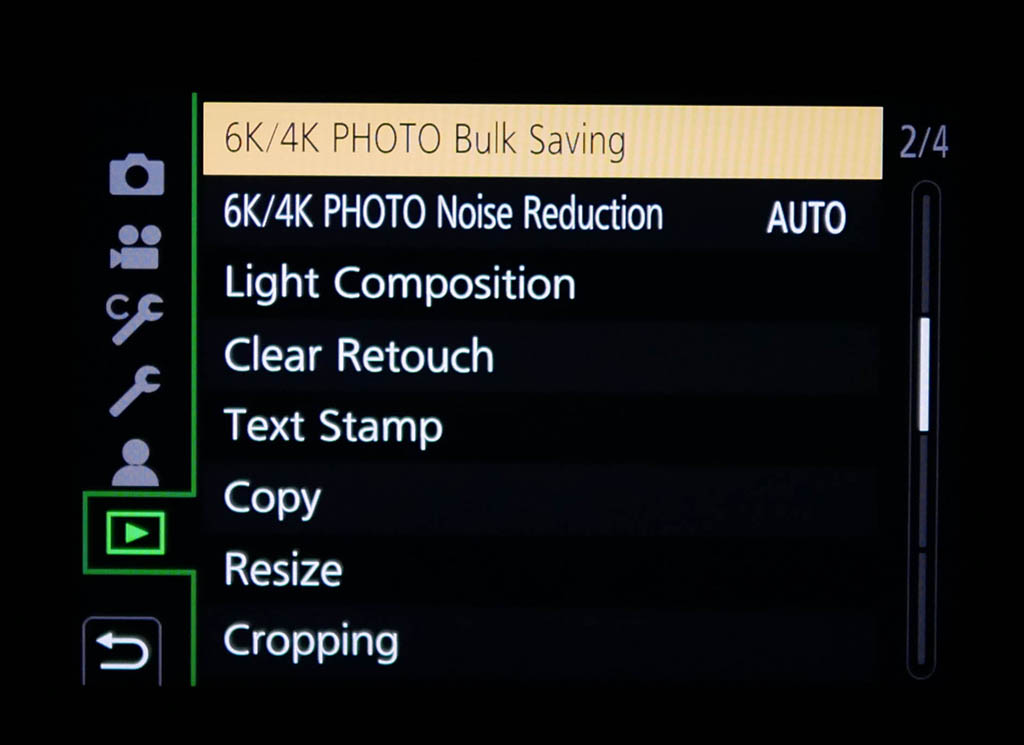
Another neat option is to use the 6K/4K Photo Bulk Saving. This will allow you to save out 5 seconds of frames as Burst Play for faster scrolling and WiFi upload.